web components 自定义表单组件
web components 自定义表单组件.
自定义组件表单是特殊组件,需要与form关联,接收组件的value,也可以赋值.
通过自定义x-input来演示.
定义一个简单的input组件
<form id="reg-form" onsubmit="onSubmit(event)">
    <input type="text" name="username" id="username"></input>
    <x-input type="text" name="email" id="email" ></x-input>
    <button type="submit">提交</button>
</form>

<script>
    customElements.define('x-input',
    class extends HTMLElement{
        constructor(){
            super();
            this.attachShadow({mode: 'open'});
            this.shadowRoot.innerHTML = `
                <input type="text" />
            `
        }
    })


</script>
x-input与input外观没区别,但通这get提交,不能获得email内容.
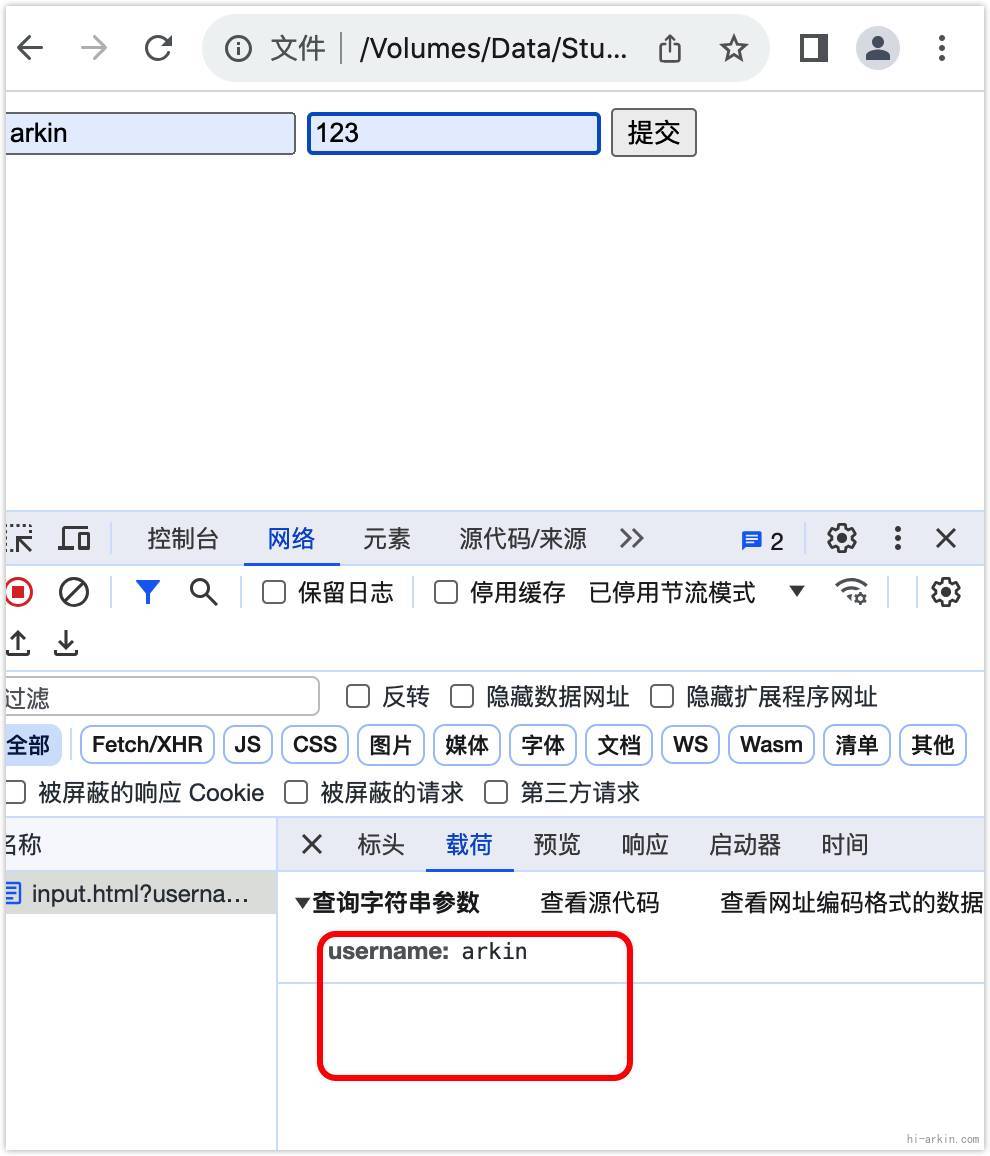
通过js直接获取

如何提供value值呢?
customElements.define('x-input',
class extends HTMLElement{
    constructor(){
        super();
        this.attachShadow({mode: 'open'});
        this.shadowRoot.innerHTML = `
            <input type="text" />
        `
        this.value="admin@163.com"
    }
})通过document.querySelector('#email').value 便可以直接获取到值
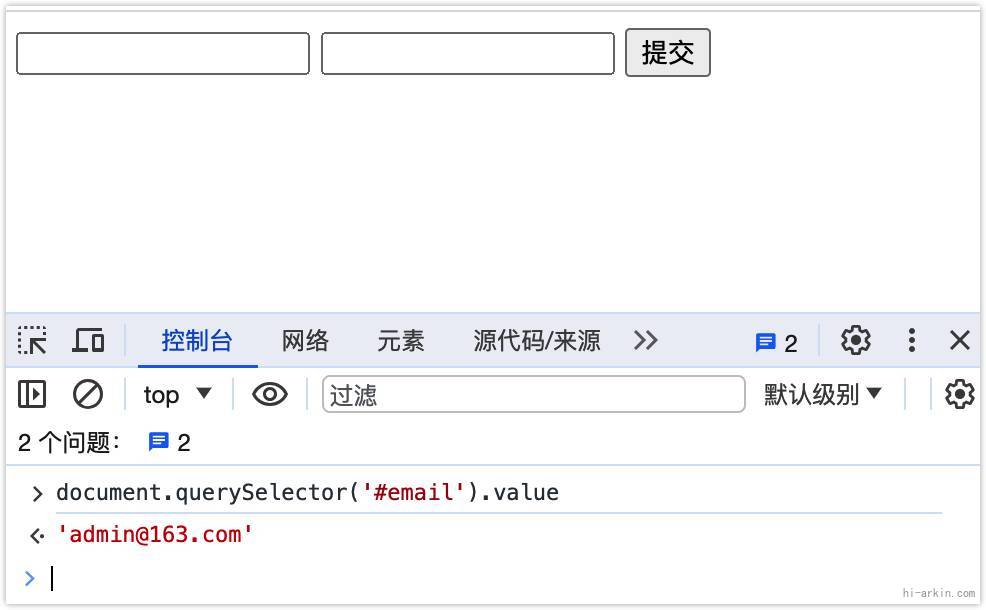
直接提交也不能传输:

查看form元素.document.querySelector('form').elements
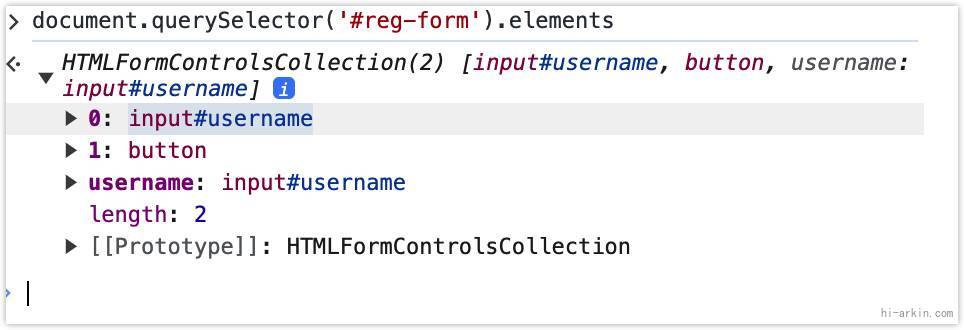
表单中没有x-input的组件.
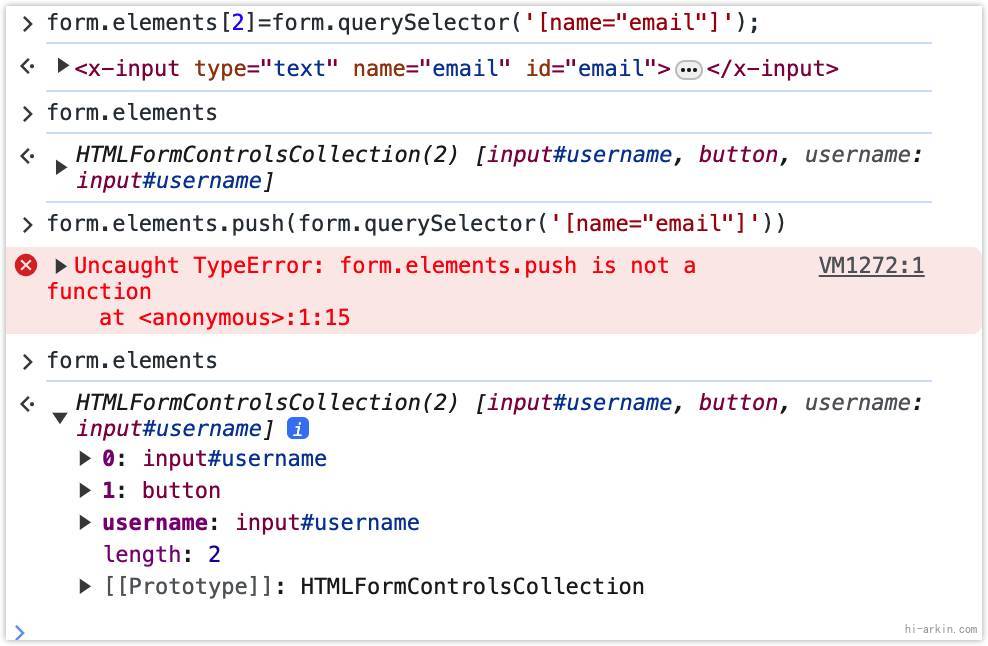
HTMLFormElement.elements 返回表单里的所有控件. elements 只读,与form控件绑定,不能直接修改.
无法直接添加.
绑定表单控件
通过 formAssociated=true 标记为form组件,浏览器把自定义组件当成FormControl组件.
customElements.define('x-input',
  class extends HTMLElement{
      static formAssociated = true;
      constructor(){
          super();
          this.attachShadow({mode: 'open'});

          this.shadowRoot.innerHTML = `
              <input type="text"  />
          `
      }
})查看elementsdocument.querySelector('form').elements
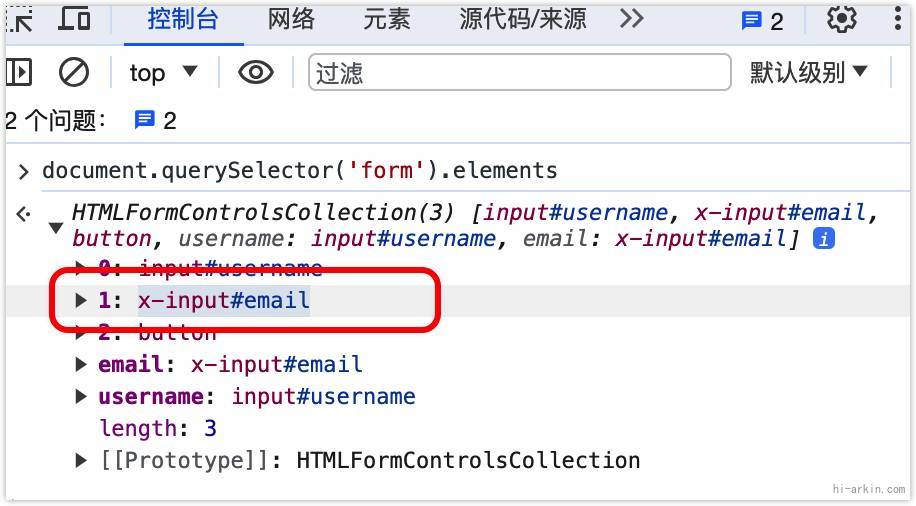
浏览器自动绑定到elements中.
绑定值
通过formAssociated关联表单控件. 如何设置值?
通过this.value 设置值
customElements.define('x-input',
  class extends HTMLElement{
      // 标记为表单元素
      static formAssociated = true;
      constructor(){
          super();
          this.attachShadow({mode: 'open'});
          this.shadowRoot.innerHTML = `
              <input type="text"  />
          `
          // 初始值
          this.value="123";
      }
  })
获取JS值:
document.querySelector('form').email.value;// 结果:123
document.querySelector('#email').value;// 结果:123
new FormData()
const formData=new FormData(document.querySelector('form'));
formData.get('email');// 结果:null
直接表单提交,结果也是null.
设置formData的值
通过attachInternals() 获得表单控件.attachInternals()只能获取一次
setFormValue: 设置值
class extends HTMLElement{
    static formAssociated = true;
    constructor(){
        super();
        this.attachShadow({mode: 'open'});

        this.shadowRoot.innerHTML = `
            <input type="text"  />
        `
        // this.value="123";
        this.internal=this.attachInternals();
        this.internal.setFormValue('456');
    }
})
可以通过表单传值,formData能获取值.
value是组件属性值,formData是表单实际值. 浏览器内置表单组件两个值由浏览器维护,是一致的.
console.log('email:',form.email?.value);// undefined
const formData=new FormData(form);
console.log('formdata.email:',formData.get('email')); // 456
基础表单组件
核心部分:
- formAssociated: 定义表单组件
- attachInternals: 表单控件API
customElements.define('x-input',
class extends HTMLElement{
    static formAssociated = true;
    constructor(){
        super();
        this.attachShadow({mode: 'open'});
        this.value=this.getAttribute('value');
        this.shadowRoot.innerHTML = `
            <input type="text" value="${this.value}" />
        `
        this.internal=this.attachInternals();
        this.internal.setFormValue(this.value);
    }
})
使用:
<form onsubmit="onSubmit(event)" >
    <input type="text" name="username" ></input>
    <x-input type="text" name="email"  value="admin@163.com"></x-input>
    <button type="submit">提交</button>
</form>
基础自定义input组件:
customElements.define('x-input',
  class extends HTMLElement{
      // 定义控件
      static formAssociated=true;
        // 监听属性
      static get observedAttributes() {
          return ["value","name","placeholder","disabled"];
      }
      #input=null;
      // 初始化
      constructor(){
          super();
          this.shadowRoot_=this.attachShadow({mode:'open'});
          // 表单控件api ,需要formAssociated=true
          this.internal_=this.attachInternals();
            // 私有值
          this.value_='';
          this.#input=document.createElement('input');
          this.#input.value=this.value_;
          this.#input.addEventListener('change',(e)=>{
              this.setValue(e.target.value);
          })
      }
      // 挂载
      connectedCallback(){
          this.shadowRoot.appendChild(this.#input);
      }
      //
      setValue(val){
          console.log("setValue")
          this.value_=val;
          this.internal_.setFormValue(this.value_);
      }
      get name(){
          return this.getAttribute('name');
      }
      // getter value
      get value(){
          return this.value_;
      }
        // setter value: xx.value=xxxx
      set value(val){
          console.log("set value")
          this.setAttribute('value',val);
      }
        // 监听: setAttribute(name,value)
      attributeChangedCallback(name, oldValue, newValue) {
          console.log("属性变化",name)
          if(name=='value'){
              this.setValue(newValue);
          }
          // 修改属性
          if(this.#input){
              this.#input[name]=newValue;
          }
      }

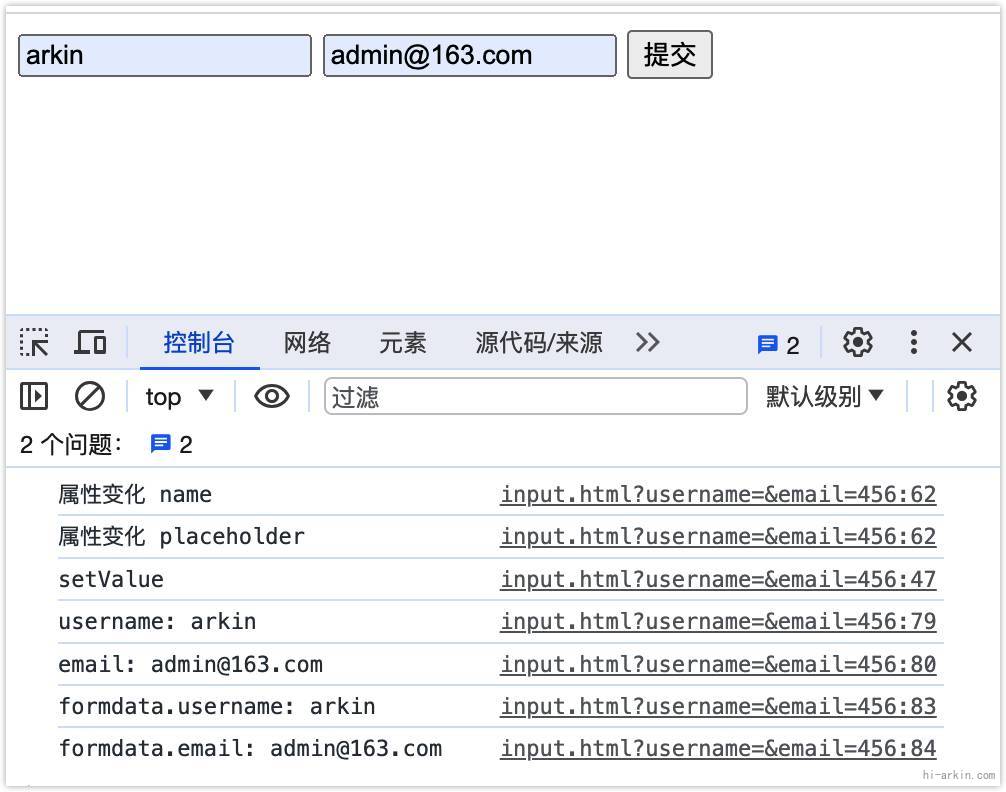
  })
表单控件生命周期
与表单关联的自定义元素 API 包含一组额外的生命周期回调,用于与表单生命周期相关联。回调并非必需:仅当您的元素需要在生命周期的相应时间点执行某项操作时,才实现回调。
formAssociatedCallback(form)
在浏览器将该元素与表单元素关联,或解除该元素与表单元素的关联时调用。
formDisabledCallback(disabled)
在元素的 disabled 状态发生变化后调用,原因可能是添加或移除此元素的 disabled 属性;或者由于作为此元素的祖先实体的 <fieldset> 上的 disabled 状态发生了变化。disabled 参数表示元素的新领用状态。例如,当某个元素被停用时,其 shadow DOM 中的元素可能会被停用。
formResetCallback()
在表单重置后调用。该元素应自行重置为某种默认状态。对于 <input> 元素,这通常涉及将 value 属性设置为与标记中设置的 value 属性匹配(或者,如果是复选框,则将 checked 属性设置为与 checked 属性匹配)
formStateRestoreCallback(state, mode)
在以下两种情况下调用:
- 浏览器恢复元素状态时(例如,导航后或浏览器重启时)。在本例中,
mode参数为"restore"。 - 当浏览器的输入辅助功能(例如表单自动填充)设置值时。在本例中,
mode参数为"autocomplete"。
自定义校验错误
https://developer.mozilla.org/zh-CN/docs/Learn/Forms/Form_validation
表单校验是浏览器内置表单数据检验.

表单校验是浏览器自带行为,即使禁用JS,也可能运行.
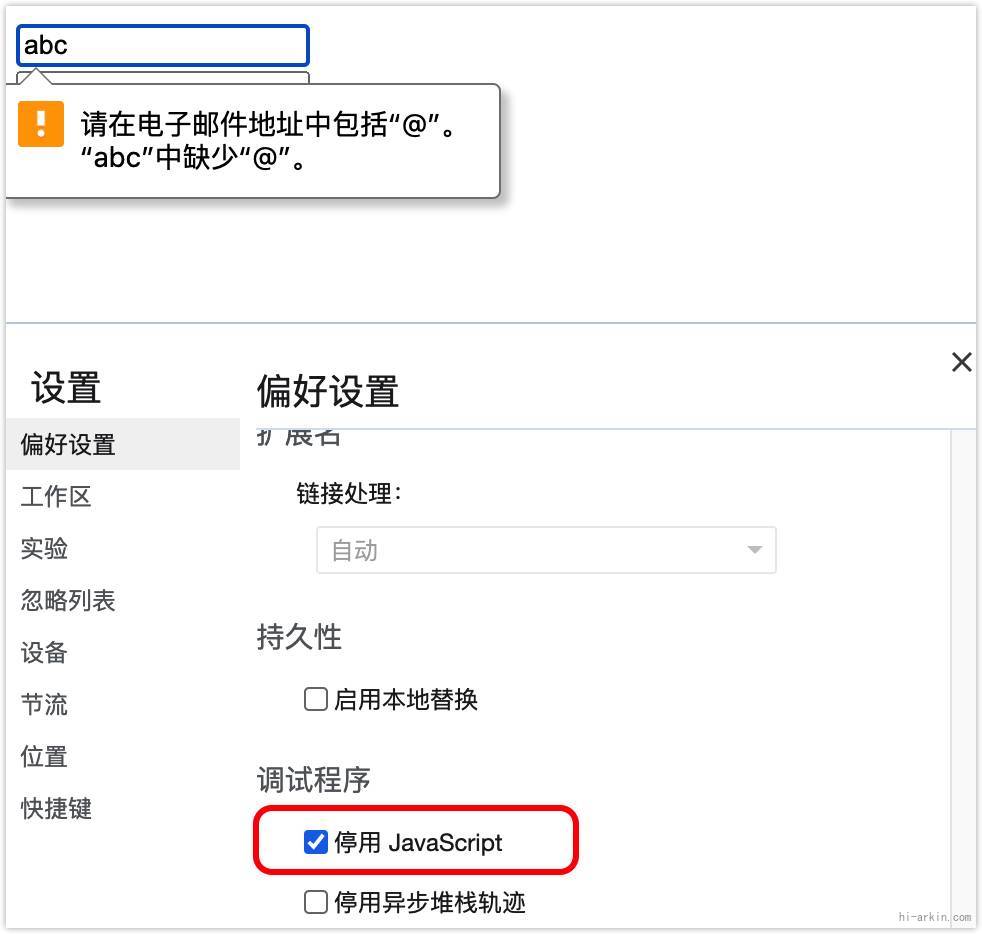
表单检验API只支持表单元素:
- HTMLButtonElement
- HTMLFieldSetElement
- HTMLInputElement
- HTMLOutputElement (en-US)
- HTMLSelectElement (en-US)
- HTMLTextAreaElement
表单校验API及属性
validationMessage属性: 本地化校验消息.根据浏览器语言返回.
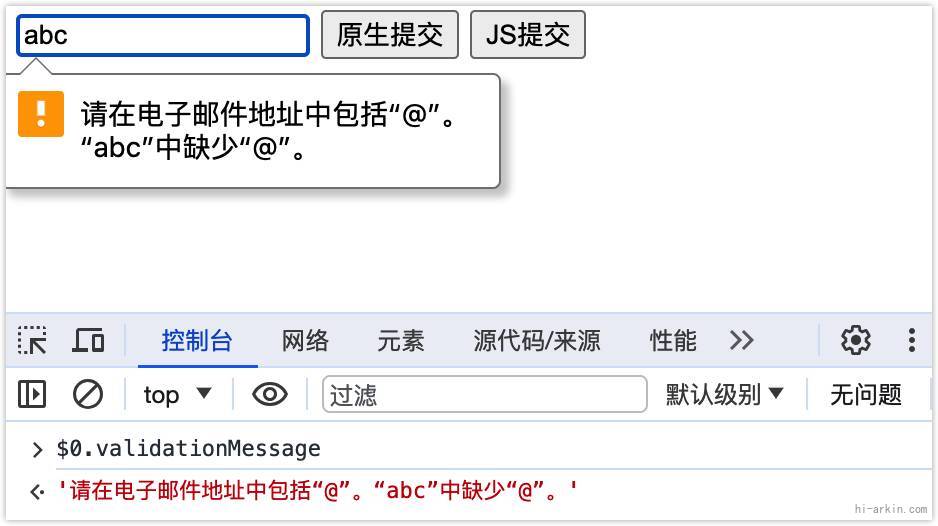
validity: 验证状态的对象.
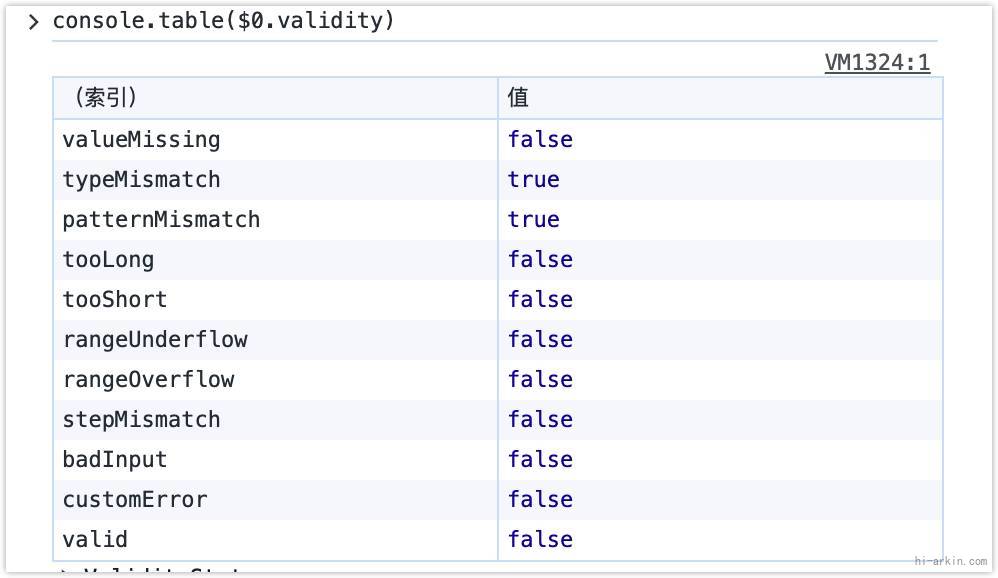
willValidate: 是否需要验证. 是为true.readonly,disabled,type="hidden"返回false
<input type="hidden" required readonly disabled />
校验方法:
checkValidity(): 控件是否校验通过.
组件检测,和form多个有其中一个检测不通过则返回false.
document.forms[0].checkValidity();//表单
document.querySelector('input').checkValidity();//单个reportValidity(): 和checkValidity 一样.校验结果浏览器会弹出提示消.
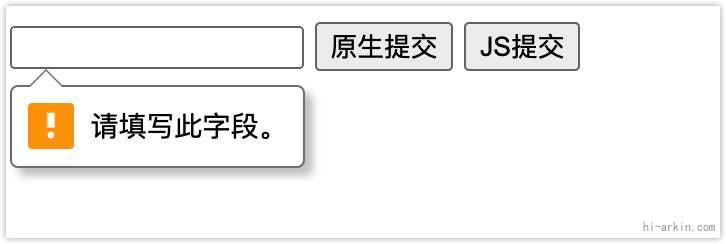
关闭表单设置自动检测,novalidate ,可以使用reportValidity 触发校验.
<form onsubmit="onSubmit(event)"  novalidate >
    <input type="text" required>
    <button type="submit">原生提交</button>
    <button type="button" id="submit-btn">JS提交</button>
</form>
<script>
document.querySelector("#submit-btn").
  addEventListener("click",function(){
      if(document.forms[0].reportValidity()){
          // document.forms[0].submit(); // 直接提交
          document.forms[0].requestSubmit();// 原生提交
      }
  })
</script>
setCustomValidity('message'): 修改校验消息内容.
document.forms[0].input.setCustomValidity("自定义消息")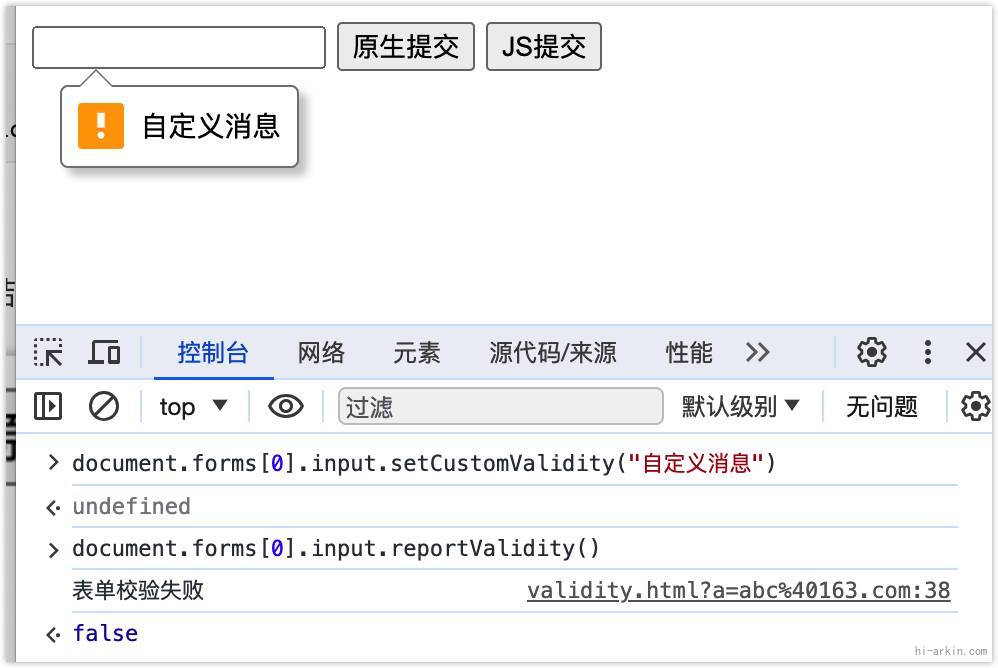
自定义组件校验
自定义的组件x-input. tabindex="0" 是为了消息框可以选中. this.internals.setValidity() 设置校验消息.
internals API: https://developer.mozilla.org/en-US/docs/Web/API/ElementInternals
<form onsubmit="onSubmit(event)"  novalidate >
      <input type="text" required />
      <x-input type="text" required value=""></x-input>
      <button type="submit">原生提交</button>
      <button type="button" id="submit-btn">JS提交</button>
</form>
<script>
    customElements.define('x-input',
    class extends HTMLElement{
        static formAssociated = true;
        constructor(){
            super();
            this.innerHTML=`
            <div
                tabindex="0"
                style="width:100px;display:inline-block;"
            > 自定义组件
            </div>`
            this.internals=this.attachInternals();
            this.focusMessage=this.querySelector('div');
            const value=this.getAttribute("value");
                        // 初始化校验消息
            if(value===undefined || value===''){
                this.internals
                .setValidity({valueMissing:true},"请填写此字段",this.focusMessage);
            }
        }
    })
</script>
validationMessage: 返回validationMessage消息.
class extends HTMLElement{
  ...
   get validationMessage(){
      return this.internals.validationMessage;
   }
}validity: 返回validity对象
class extends HTMLElement{
  ...
  get validity(){
    return this.internals.validity;
  }
}willValidate: 返回willValidate 属性.
<x-input type="text" readonly ></x-input>
方法:
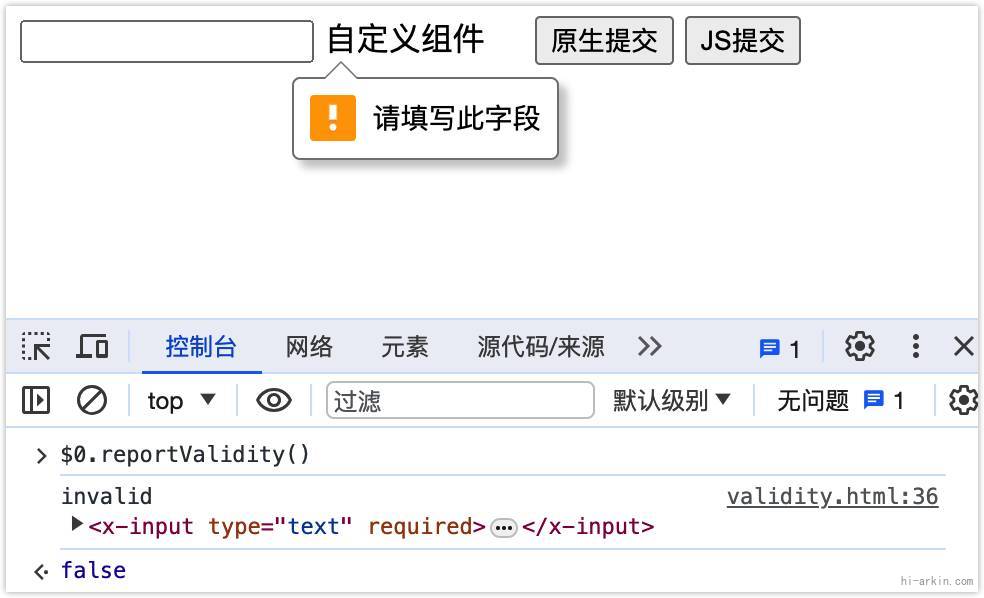
checkValidity()reportValidity()
class extends HTMLElement{
  ...
  checkValidity(){
      return this.internals.checkValidity();
  }

  reportValidity(){
      return this.internals.reportValidity();
  }
}
setValidity: 自定义消息
语法:
setValidity(flags)
setValidity(flags, message)
setValidity(flags, message, anchor)
flags: 消息类型对象.
message: 消息
anchor: 消息提示的位置,并且可focus选中.
class extends HTMLElement{
  ...
  setValidity(validity,message){
      return this.internals.setValidity(validity,message,this.focusMessage);
  }
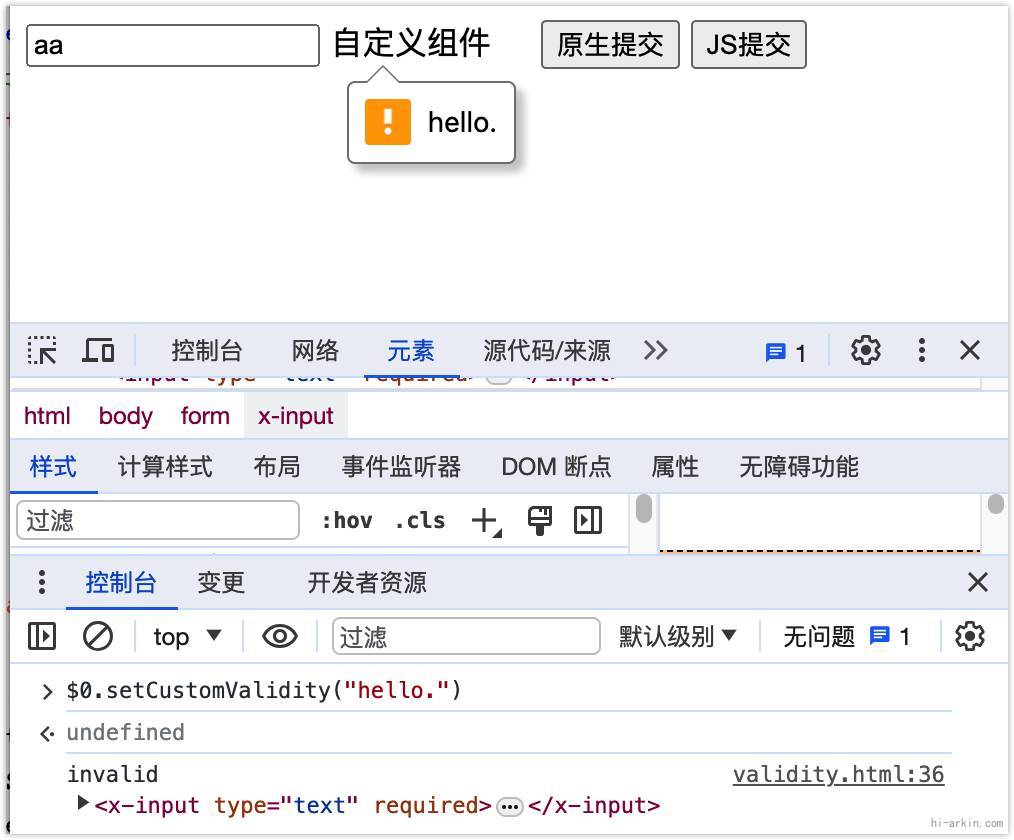
}setCustomValidity: 自定义消息
class extends HTMLElement{
  ...
  setCustomValidity(message){
      return this.setValidity({customError:true},message);
  }
}
利用原生表单控件 代理
internals 需要自己检验,自定义消息类型,需要自己做本地化消息. 与原生浏览器不符一致.可以利用原生表单控件.
<x-input type="email" required value="abc" ></x-input> customElements.define('x-input',
class extends HTMLElement{
static formAssociated = true;
constructor(){
super();
this.innerHTML=`
<div
tabindex="0"
style="width:100px;display:inline-block;"
> 自定义组件
</div>`
this.internals=this.attachInternals();
this.focusMessage=this.querySelector('div');
// 代理input
this.input=document.createElement('input');
// 继承所有属性
for(let attr of this.attributes){
this.input[attr.name]=attr.name=='required'?true:attr.value;
}
this.internals.setValidity(
this.input.validity,
this.input.validationMessage,
this.focusMessage);
}
}
input
<form >
    <input name="email1" type="email" required value="abc@163.com" ></input>
    <x-input name="email2" type="email" required value="abc@163.com" ></x-input>
    <button type="submit">原生提交</button>
</form>
<script>
customElements.define('x-input',
  class extends HTMLElement{
      static formAssociated = true;
      static get observedAttributes() {
          return [
          'type',
          'value',
          'placeholder',
          'autocomplete',
          'required',
          'min',
          'max',
          'minlength',
          'maxlength',
          'pattern',
          'disabled'
          ]
      }
      constructor(){
          super();
          this.attachShadow({mode: 'open',delegatesFocus:true});
          this.shadowRoot.innerHTML=`
          <style>
                  :host{
                      box-sizing: border-box;
                      display: inline-block;
                      border: 1px solid rgb(118,118,118);
                      cursor: text;
                      width:139px;
                      height:21px;
                      vertical-align:middle;
                      border-radius: 2px;
                      text-indent: 2px;
                      vertical-align: middle;
                      font-size: 13.3px;
                  }
                  :host(:focus){

                  }
                  :host([disabled]){
                      background-color:#f8f8f8;
                      border-color:#d1d1d1;
                  }
                  :host > .edit{
                      height:20px;
                  }

                  :host >.edit:empty::before{
                      display:block;
                      content: attr(placeholder);
                      text-wrap: nowrap;
                      overflow: hidden;
                      color:rgb(117,117,117);
                  }
              </style>
              <div
                  class="edit"
                  contenteditable

              ></div>
          `

          this.internals=this.attachInternals();
          this.focusMessage=this.shadowRoot.querySelector('div');

          this.input=document.createElement('input');

          this.editor=this.shadowRoot.querySelector(".edit");

          this.editor.addEventListener("input",(e)=>{
              const value=e.target.textContent;
              this.input.value=value;
              this.internals.setFormValue(this.value)
              this.setValidity();
          })

      }
      connectedCallback(){
          this.setValidity();
      }
      get value(){
          return this.input.value;
      }
      set value(val){
          this.input.value=val;
          this.internals.setFormValue(val)
          this.editor.textContent=this.value
          this.setValidity();
      }
      attributeChangedCallback(name, oldValue, newValue) {
          console.log(name,oldValue,newValue)
          this.input[name]=name=='required'?true:newValue;
          if(name=='value'){
              this.value=newValue;
          }
          if(["disabled","readonly"].includes(name)){
              this.editor.setAttribute('contenteditable',newValue?false:true);
          }
          if(name=='placeholder'){
              this.editor.setAttribute(name,newValue);
          }

      }
      get validationMessage(){
          return this.internals.validationMessage;
      }
      get validity(){
          return this.internals.validity;
      }
      get willValidate(){
          return this.internals.willValidate;
      }

      checkValidity(){
          return this.internals.checkValidity();
      }

      reportValidity(){
          return this.internals.reportValidity();
      }

      setValidity(){
          return this.internals.setValidity(
              this.input.validity,
              this.input.validationMessage,
              this.focusMessage);
      }

      setCustomValidity(message){
          this.input.setCustomValidity(message);
          return this.setValidity();
      }
  })
</script>
效果和普通input一样:

注: 声明式shadowroot 还不支持表单控件,需要js支持.
原作者:阿金
本文地址:https://hi-arkin.com/archives/WCs-form.html
