模板标签函数原理
html``模板标签函数html原理
支持模板变量和表达式,自定义事件@event ,事件支持变量,嵌套标签
变量:
const name ="arkin"
const div=html`<div>姓名:{$name} 年龄:${20+5}</div>`
document.body.appendChild(div);
事件:
const onClick=function(){console.log("点击事件")};
const btn=html`<button @click="${onClick}">按扭</button>`;
document.body.appendChild(btn);
嵌套标签变量:
const onClick=function(){console.log("点击事件")};
const btn=html`<button @click="${onClick}">按扭</button>`;
const div=html`<div>${btn}</div>`
document.body.appendChild(div);
web components组件使用:
class XButton extends HTMLElement {
  ...
  clickHandler() {
      console.log('clicked');
  }
  render() {
      return html`<button
        @click="${this.clickHandler}"
      >自定义按扭</button>`
  }
}
html模板标签函数
参考:
模板字符串: https://developer.mozilla.org/zh-CN/docs/Web/JavaScript/Reference/Template_literals
https://developer.mozilla.org/zh-CN/docs/Web/JavaScript/Reference/Global_Objects/String/raw
const  html=(strings, ...values) =>{
  return String.raw({raw: strings },...values);
}
支持dom节点类型的变量
const html=String.raw;
const btn1=document.createElement('button');
btn1.innerHTML="按扭1";
btn1.addEventListener("click",()=>console.log('btn1 click.'));
const btnName='按扭2'
const btn2=html`<button onclick="{console.log('btn2 click.')}" >${btnName}</button>`
const div=html`<div>按扭1:${btn1} 按扭2:${btn2}</div>`
document.body.innerHTML=div;
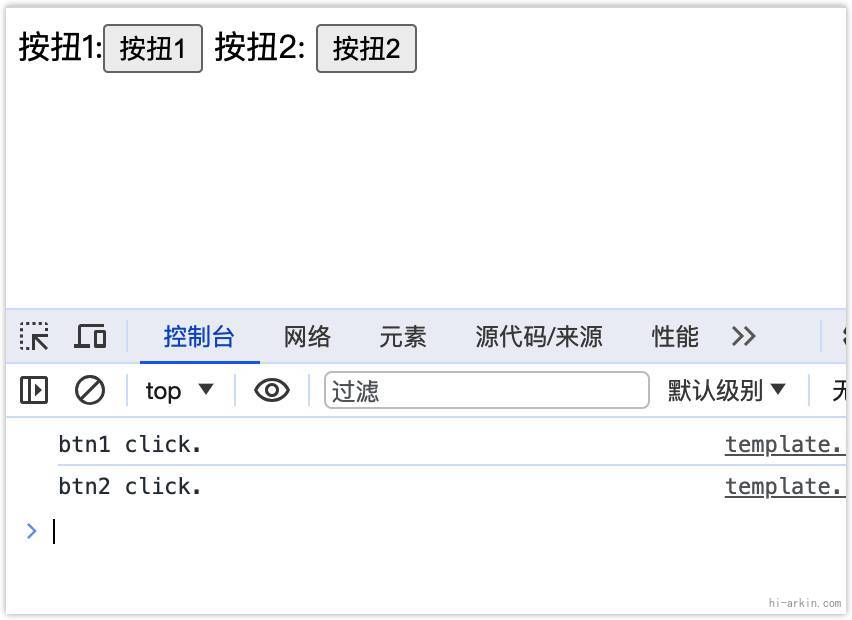
上面结果:

如果使用innerHTML,dom对象则输出object字符串而不是输出标签.但又要保证事件能监听.
步骤:
- 把模板中的node节点变量,暂时存储起,用临时标签替换
- 等模板字符串都替换完成,再批量替换成原来的node节点变量
- 最后返回DocumentFragment
 const html=(strings,...values)=>{
    // 创建临时
    const template = document.createElement("template");
    // 1. 把对象换成临时标签
    const mark='tag'+String(Math.random()).slice(9);
    const parts=[];
    for(let i=0;i<values.length;i++){
        //2. 替换成临时标签
        if(values[i] instanceof DocumentFragment
        || values[i] instanceof Element
        ){
            parts[i]=values[i];
            values[i]=`<template ${mark}="${i}" ></template>`;
        }
    }
    //  变量转成dom节点
    template.innerHTML =String.raw(strings,...values);
    const content= document.importNode(template.content, true);

    // 3. 批量把临时标签替换成node节点
    content.querySelectorAll(`[${mark}]`).
    forEach((node)=>{
        const index=node.getAttribute(`${mark}`);
        node.parentNode.replaceChild(parts[index],node);
    });
        // 返回DocumentFragment
    return content;
}
上面的结果,节点和事件都没丢失.

注,上面变量只能复制一次.
如果要复制多次,使用cloneNode,但是使用cloneNode后,原来的事件监听将丢失.
增加@event事件
浏览器只支持简单的事件和字符串类型的事件函数,有限的事类型,不支持自定义事件
类似onclick事件
const btn=html`<button @click="{this.onClick}"></button>`
const btn=html`<button @click={${()=>{console.log(123)}}}></button>`
const btn=html`<button id="btn2" @custom-event="{this.onCustom}"></button>`

document.querySelector('#btn2').dispatchEvent(new Event('custom-event'))
和上面dom变量一样原理:
- 先匹配到
@event=${}变量,模板的values和string是一一对应的 - 用临时属性代替
- 等模板内容都替换完成之后,再遍历所有属性,替换成原来的变量
- 最后删除@event属性
const html=(strings,...values)=>{
  const template = document.createElement("template");
  // 把对象换成临时标签
  const mark='tag'+String(Math.random()).slice(9);
  const parts=[];

  const eventSuffix='';
  const events=[];
  for(let i=0;i<values.length;i++){


      // 替换成临时标签
      if(values[i] instanceof DocumentFragment
      || values[i] instanceof Element
      ){
          parts[i]=values[i];
          values[i]=`<template ${mark}="${i}" ></template>`;
      }

     // 查找有@event的变量
     if(/@[a-zA-Z]+=[\'\"]?$/.test(strings[i])){
          events[i]=values[i];
          values[i]=i;
      }

  }
  template.innerHTML =String.raw(strings,...values);
  const content= document.importNode(template.content, true);

  // 批量把临时标签替换成node节点
  content.querySelectorAll(`[${mark}]`).
  forEach((node)=>{
      const index=node.getAttribute(`${mark}`);
      node.parentNode.replaceChild(parts[index],node);
  });

  // 遍历所有node节点
  const walker=document.createTreeWalker(content,
  NodeFilter.SHOW_ELEMENT,null,false);
  let node=null;
  while((node=walker.nextNode()) !== null){
      if (node.hasAttributes()) {
          // 遍历所有属性
          for (const name of node.getAttributeNames()) {
              const value = node.getAttribute(name);
              const m = /([.?@])?(.*)/.exec(name);
              // 包含有@的属性
              if(m[1]==='@'){
                  const event=events[value];
                  if(event){
                      node.addEventListener(m[2],event);
                  }
                  node.removeAttribute(name);
              }
          }
      }
  }

  return content;
}document.createTreeWalker创建可遍历节点树.
在webComponents 组件中使用
onclick="{console.log(this)}" 时,并没有指向组件的this.
<x-button name="自定义按扭"></x-button>
<script>
    customElements.define('x-button',
        class extends HTMLElement
        {
            constructor()
            {
                super();
                const shadow=this.attachShadow({mode:'open'});
                shadow.appendChild(html`
                    <button @click="${this.clickHandler}" >
                        ${this.getAttribute('name')}
                    </button>
                `)
            }
            clickHandler=()=>{
                console.log("clickHandler",this)
            }
        }
    )
</script>
最后,参考Lit-html 的模板 https://lit.dev/docs/templates/overview/
lit-html 实现的比较复杂,反回的是一个对象,而不 是dom标签.只能在自定义组件里面使用,但大概原理都类似.
原作者:阿金
本文地址:https://hi-arkin.com/archives/template-html.html
